Your workspace balance pays for phone numbers and calls. It’s separate from your plan, which covers user licenses. Payments are processed securely by Stripe.
Before you start
- Only the workspace Owner can add funds. Admins can see the balance; if an Admin opens the page, it says Only the workspace owner can add funds.
- The first time, you’ll be asked to verify your identity.
Add funds
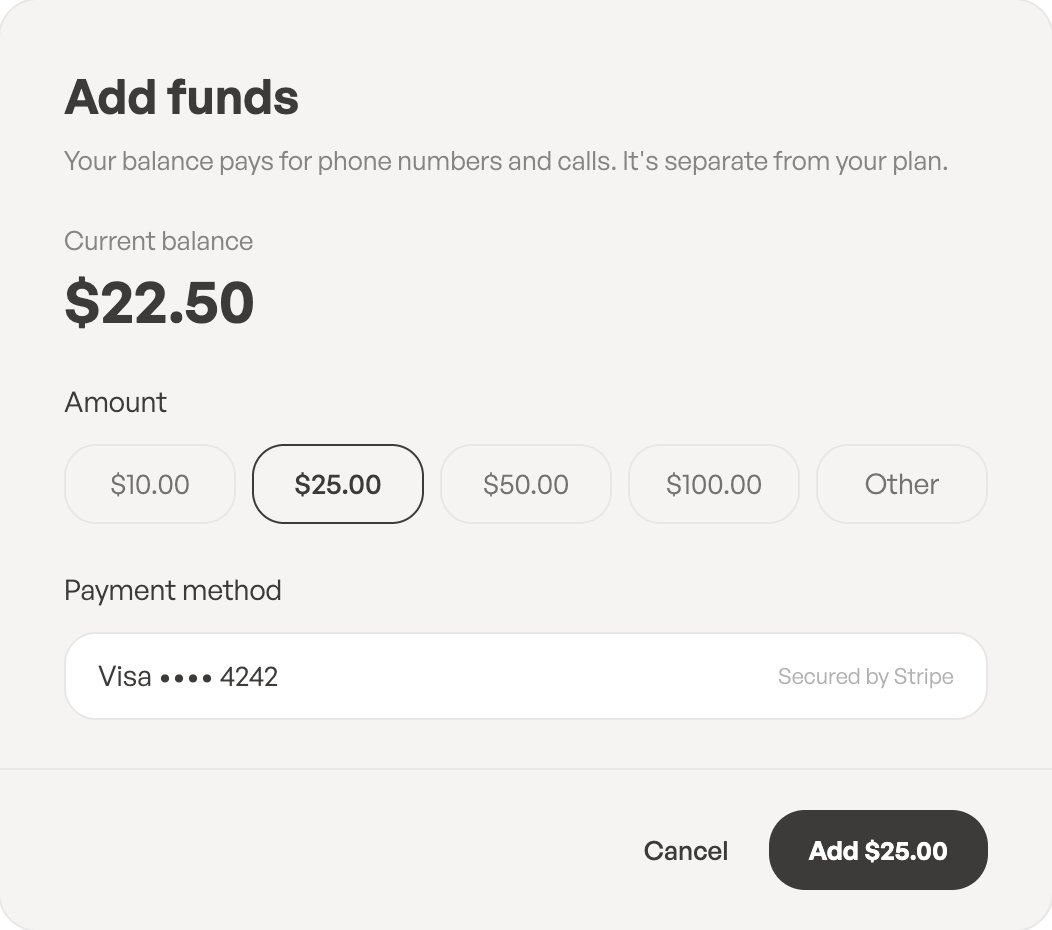
- Click your balance, the green amount at the top of the screen. You can also click Add funds in Workspace settings → Billing.
- Under Amount, click one of the preset amounts, or click Other and type your own amount. The allowed range is shown under the field.
- Under Payment method, check the card. If no card is saved yet, you’ll enter it securely on Stripe.
- Click Add … (the button shows the amount).
- Complete the payment on the Stripe page.

Back in ToCaller you’ll see Payment received. Your balance updates as soon as Stripe confirms it. This usually takes a few seconds, and you also get a Funds added notification in the bell menu.
If you close the Stripe page without paying, you’ll see Payment cancelled. Nothing was charged.
See your balance activity
The Add funds page shows your Recent activity: the last 5 changes to your balance, with a description, a date and the amount (for example + for a top-up, − for a charge). For the full list with the balance after each change, open Workspace settings → Billing.
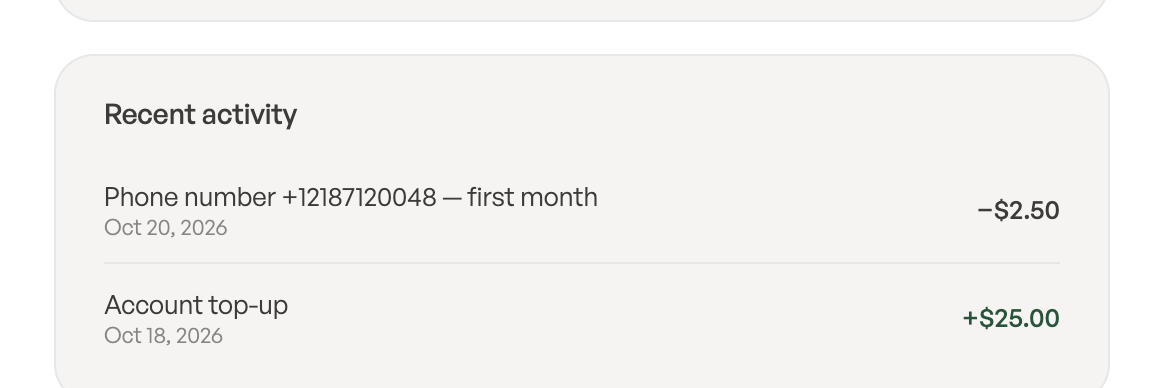
You’ll see entries such as:
- Account top-up: money you added.
- Phone number … — first month: the first month of a number you bought.
- Refund: phone number … could not be bought: money returned when a number order failed.
If a payment fails
You’ll get a Top-up failed notification: your bank didn’t complete the payment, so nothing was added. Try again with another payment method. If you see Payments are unavailable right now, wait a few minutes and try again.